Offering a product interface in the end-user’s preferred language makes it user friendly and enhances their understanding of the functionality.
For a wider reach, supporting multiple languages for a product will be required.
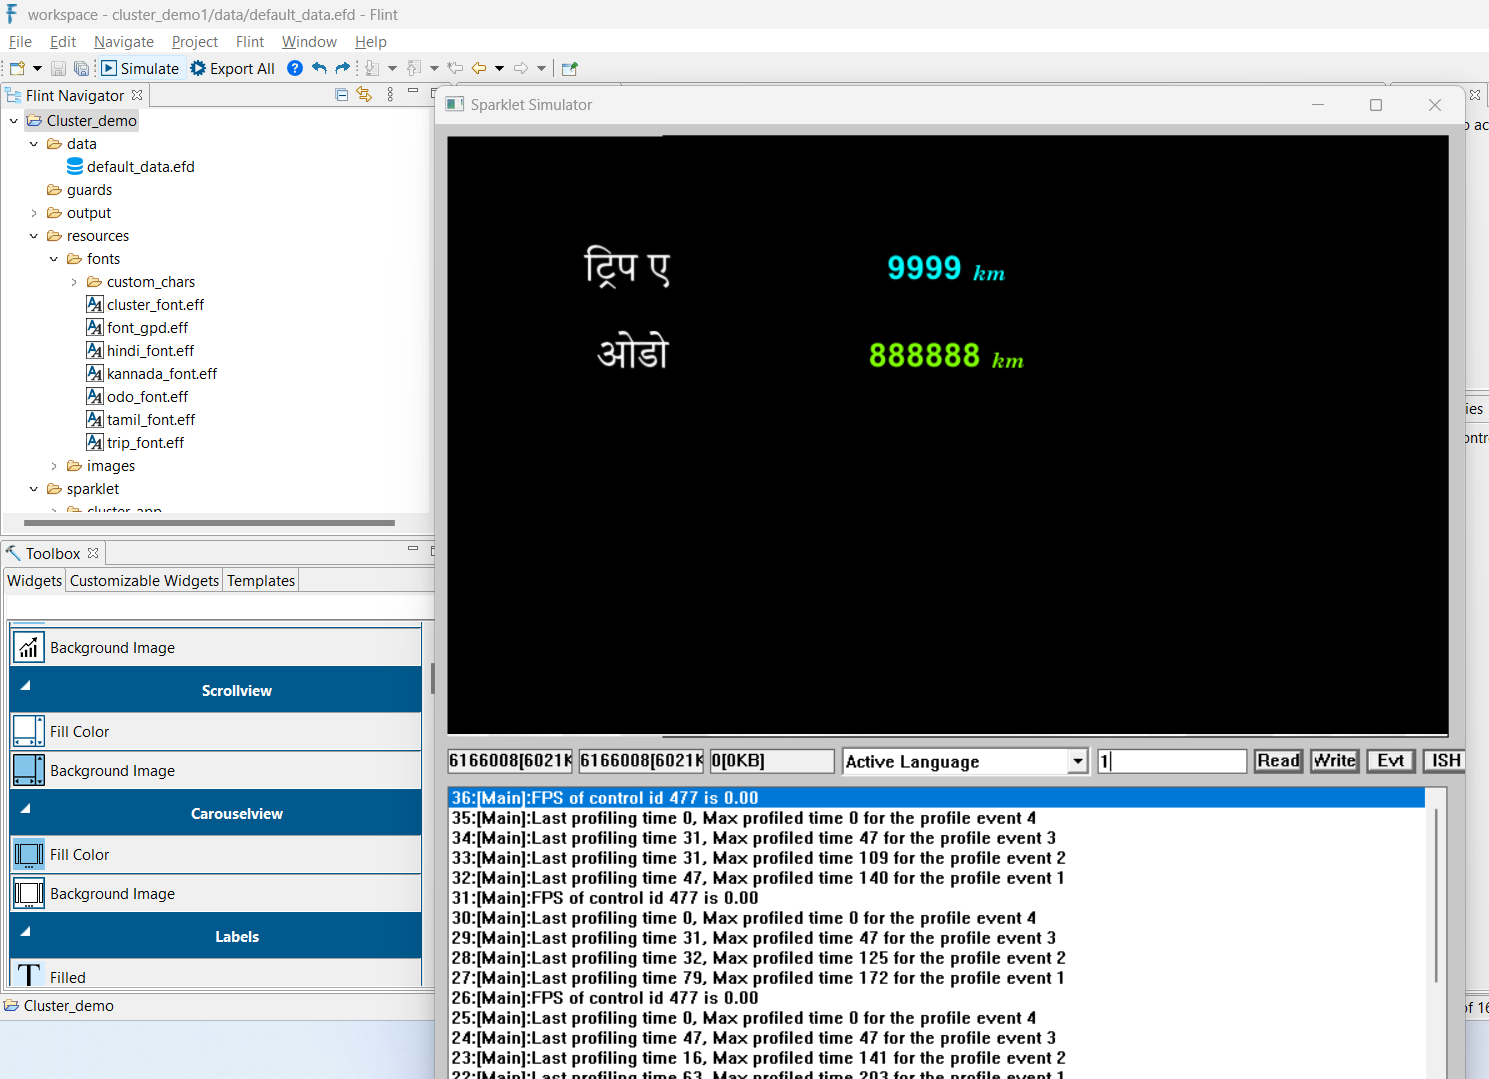
Flint facilitates multi-language features through 16-bit Unicode, allowing users to work with a broader range of characters and symbols beyond the standard ASCII character set.
With its multi-language support, it allows users to select their preferred language for a more comfortable experience.
To enable Unicode character support in Flint, create a font file, opt for an appropriate Unicode font and choose the Character Set as a Unicode file.
We’ve opted for the “Gen Jyuu Gothic Monospace” font to accommodate Japanese characters.
Now add the required Japanese characters to a text file under custom_chars (resources → fonts → custom_chars) and map this text file to font → Custom Chars as shown below for the Japanese fonts:
Now create a Data variable, select the Storage type as “Unicode Encoded” and set the maximum length of the character.
Next, go to the Data Bridge tab, click on ‘Add’, provide the name and ID, select conversion as “To String”, then map the UE data variable to Data 0 and click OK and Save.
Now export the project. In the simulation, to write a dynamic character in the label widget, select the data id and give value in the format of “ue:” followed by the character Unicode values. For example, below hexadecimals are the 16bit Unicode representation of the Japanese text. “ue:3053,3093,306b,3061,306f” which represent the Unicode “こ - 3053, ん - 3093, に - 306b, ち- 3061, は- 306f” respectively.
Thus, by selecting the Unicode Encoded type, users can input, manipulate, and display text data containing characters from various languages, special symbols and ensuring compatibility with diverse linguistic and typographic requirements.
Many languages share a basic character set with English but require only a few additional diacritics to represent unique sounds or characters.
In Flint, users can add these diacritics as custom characters within English fonts. Instead of relying solely on Unicode type fonts, custom characters are added to the font to ensure proper representation of these languages.
Sometimes, it is essential to support different languages at the same location based on user preference. This can be achieved with the grouped font concept discussed earlier on Fonts in Flint section.
Now, let’s explore the steps to support three languages: Hindi, Tamil, and Kannada simultaneously. Begin by generating a font file within the “resources -> fonts”.
Once the font file is created, select a suitable Unicode font and choose the Character Set as Unicode file.
Now add the required characters to a text file under custom chars (resources -> fonts -> custom chars) as shown below:
In Flint, the EFR file serves as the translation file for storing pre-translated texts in multiple languages. Let us see how to create a table of texts with their translations and use them.
Now double click on EFR file under resources, now click on Add/Edit language option and select the desired language from language selection dialog and add the texts in different languages as shown below:
To use the same, drag and drop a Labels widget and map the Group font to it. Then open data file, create Data Variable to represent the total number of languages to be accommodated as shown below,
and then create Data Bridge for the texts, select Conversion as Translation and select the translation id from the dialog and add the data variable (Active Language) to it as shown below:
Now map the data-bridge to the corresponding textboxes. Then go to flint.efp , click Supported Language tab. Select the required languages that are to be exported.
In many cases, the text to be displayed will be dynamically received in the system via external connectivity such as Bluetooth, WiFi, CAN etc. In this case, it is not possible to go for the EFR approach. Rather, create a Data variable with UE string type and map it to the label along with selecting the font as the grouped font.
Thus, Flint offers multiple ways to show different language information and update them either statically or dynamically.
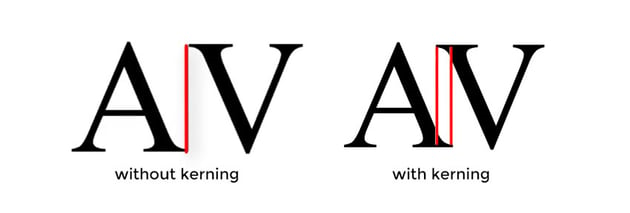
Kerning is the process of adjusting the spacing between characters usually to achieve a visually pleasing result. Kerning makes character spacing more uniform and pleasant to read.
Flint allows the user to modify the properties of a font, including its kerning table. Some fonts may require kerning with some letter pairs while others may not.
To enable kerning for fonts, open the font file in Flint, enter the point value by which to expand or condense the space to the right of Default Kern Value under Font Information as shown below
Flint also supports kerning for image-based fonts. To enable kerning, open the font file in Flint, check the box for Character Wise Kerning under Font Information.
Now click on the Kern table in which the user can choose the kern value to adjust the spacing between characters which is required.